-
Tutorial: How to Create a Double Exposure Portrait with Photoshop
March 31, 2017
March 31, 2017
Tutorial: How to Create a Double Exposure Portrait with Photoshop
Tutorial: How to Create a Double Exposure Portrait with Photoshop
Today we would like to share this tutorial from our friends from Adobe Photoshop in collaboration with image creator Ted Chin released exclusively for their Instagram channel. You’ll be able to learn how to create a Double Exposure Portrait with Photoshop. I know we don’t usually share tutorials on Friday but why not! Carefully follow these steps with your own images and create your own experiments. Enjoy!
This tutorial is by Ted Chin who is an artist/image creator based in San Francisco, USA. You should definitely check out his site for tutorials and make sure to follow him on Instagram.
Crafting what I believe is creative, I use photography and modern technology to manipulate it. I am able to recreate what I imagine.
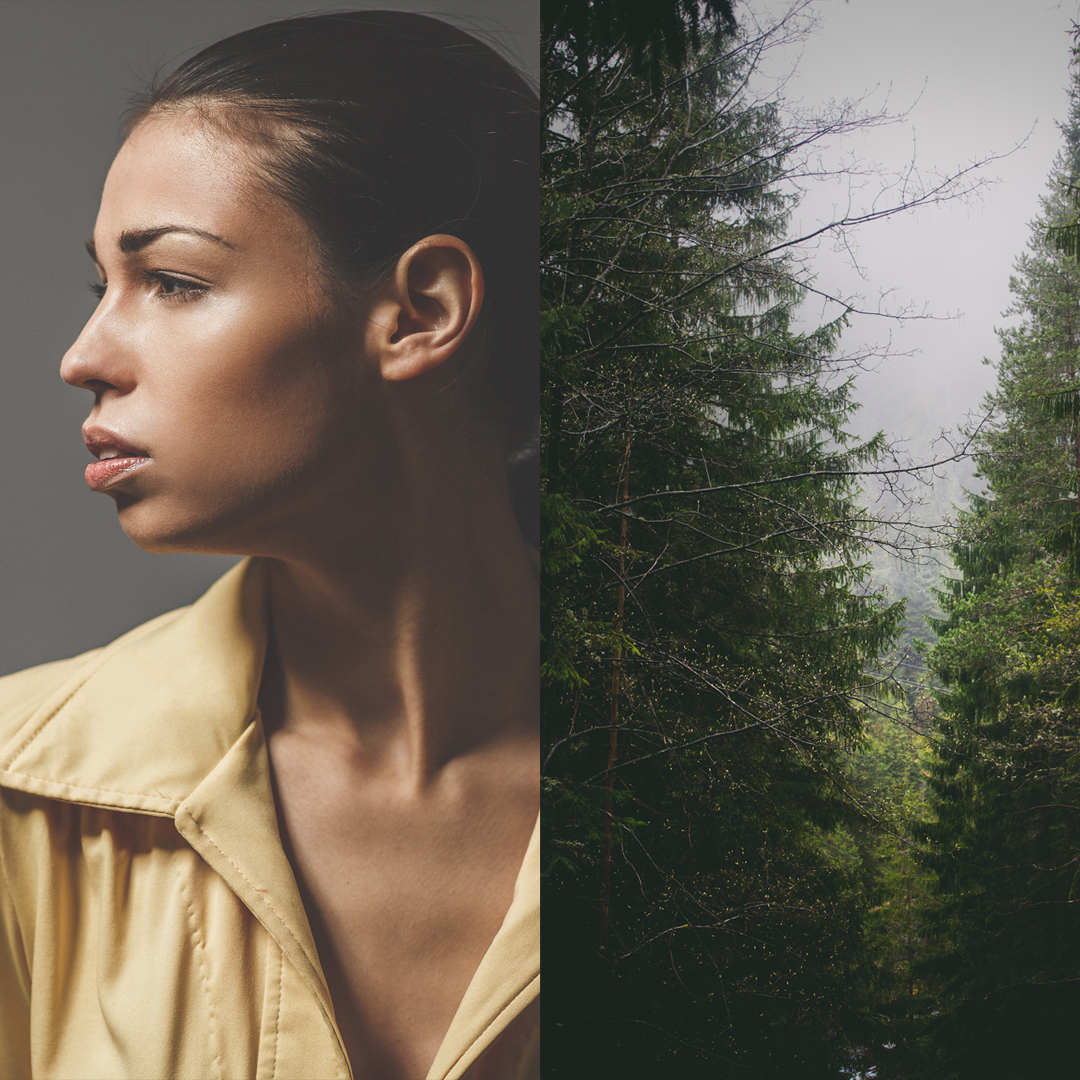
Result
Step 1
Hey guys! It’s Ted (@eye.c) here. Today I’m going to show you how to create a double exposure portrait in just few simple steps.

Step 2-3
Using photos with simple backgrounds will help with the masking process. First, open the portrait (base) photo in #Photoshop. We are going to mask the background out and create the double exposure effect with the shape of the model.

Step 4
Use the magic wand tool (W), click and select the background. Go to Select -> hold the “shift” key and click “Select and Mask”. Smooth the edge with the “Refine Edge Tool”, then click ok.
Step 5
Click on “Add a mask” then, “Create a new layer.” Move the new layer to the bottom of the portrait. Select the “Paint Bucket Tool”, or press “G”, and fill in the white background.
Step 6
Paste the second image, and adjust the image with “Levels” (Ctrl + L). Make sure the adjustment layer is clipped to the second image only. We want to make sure the sky is bright/clean enough so it’s easier for selection. Hold (Ctrl + left click) on the portrait’s mask we created earlier, then create a new layer mask for the landscape photo.
Step 7
Un-link the mask by clicking the symbol in between, and re-adjust the landscape photo to the way you prefer.
Step 8
Duplicate the Portrait layer and move the copy to the top of the landscape layer. Then change the blending mode to “Lighten”.
Step 9
I decided to add other elements (flowers) by using the same blending mode (Lighten) from the last step.
Step 10
If you think the white background is too boring, you can try to add a different background, too. And this is how you can create a simple double exposure portrait!

#abduzeedo
AoiroStudio
Mar 31, 2017
Source: Abduzeedo Tutorials
0 Comments
Leave A Comment