-
Learn How to Create Paper Cut Effect with this Photoshop Tutorial
April 5, 2018
April 5, 2018
Learn How to Create Paper Cut Effect with this Photoshop Tutorial
Learn How to Create Paper Cut Effect with this Photoshop Tutorial
Lidia Lukianova shared a simple but quite awesome Photoshop tutorial. She shows us how to create a beautiful Paper Cut effect using the Pen Tool and Layer Styles in Photoshop. The result is quite realistic and below you can see a step-by-step. Lidia was also kind to share the source file, just in case you want to check it out.
You can download a practice file here: http://adobe.ly/1I2kW2C
Photoshop Tutorial
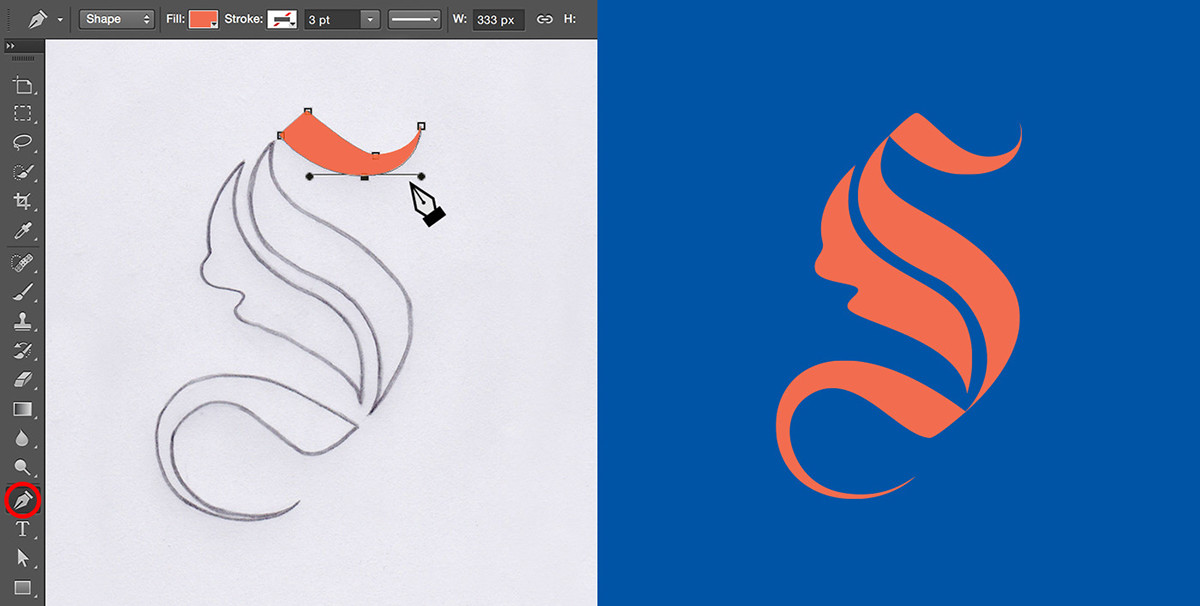
Step 1
Use the Pen tool to create the letter shapes and fill them with color.

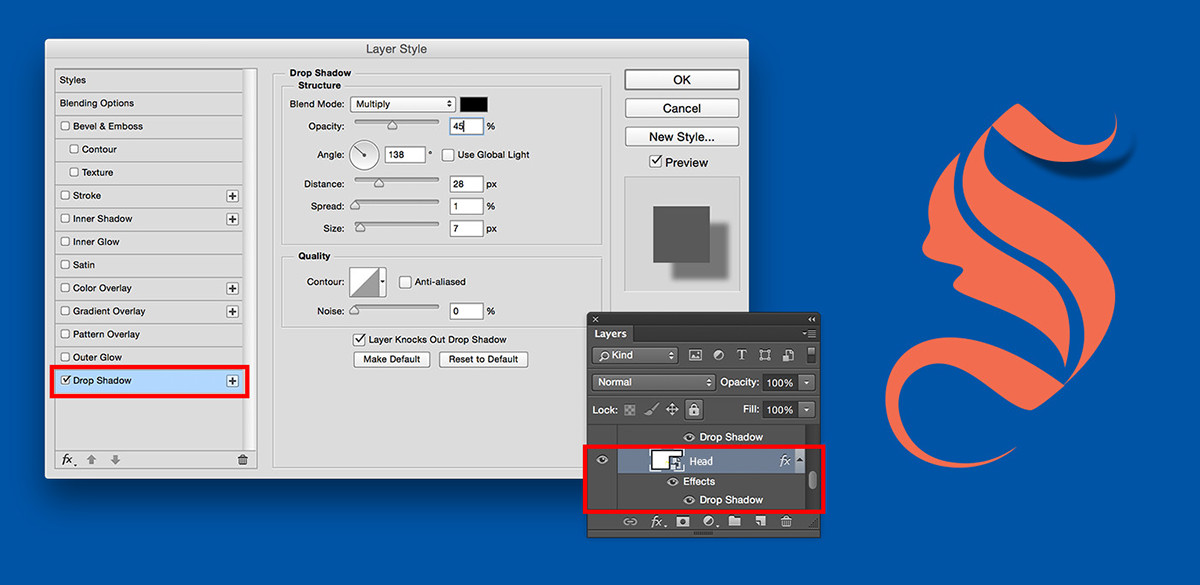
Step 2
To add a shadow to the top part of your letter, double-click its layer in the Layer panel and choose Drop Shadow. Adjust the settings to achieve the desired effect. Uncheck the Use Global Light checkbox.
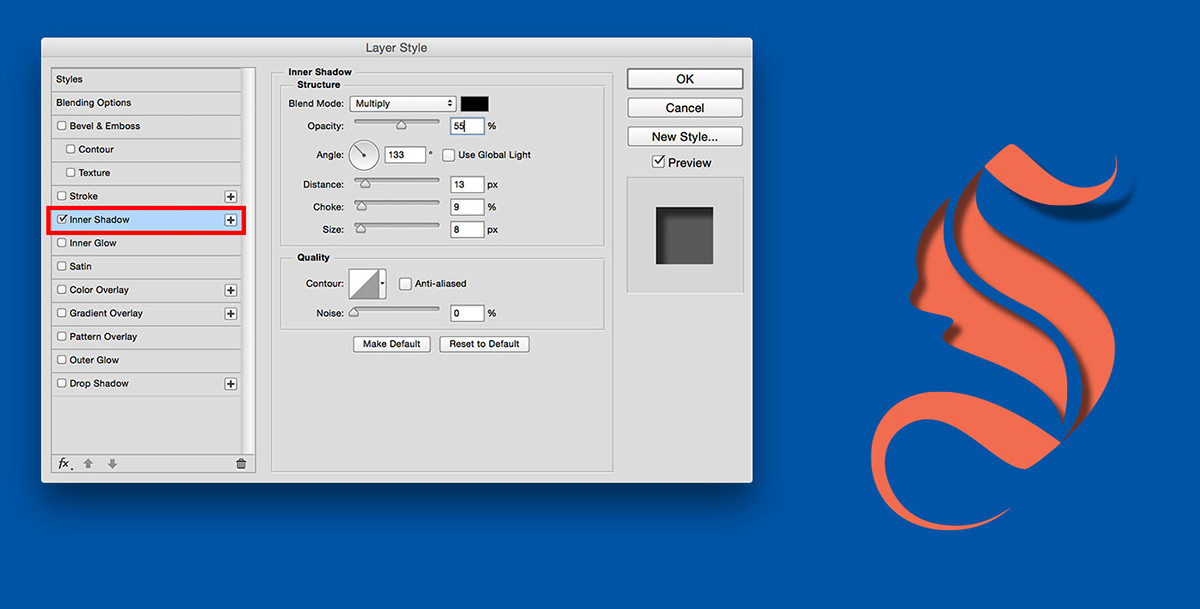
Step 3
Add Inner Shadow to the center part of your letter.
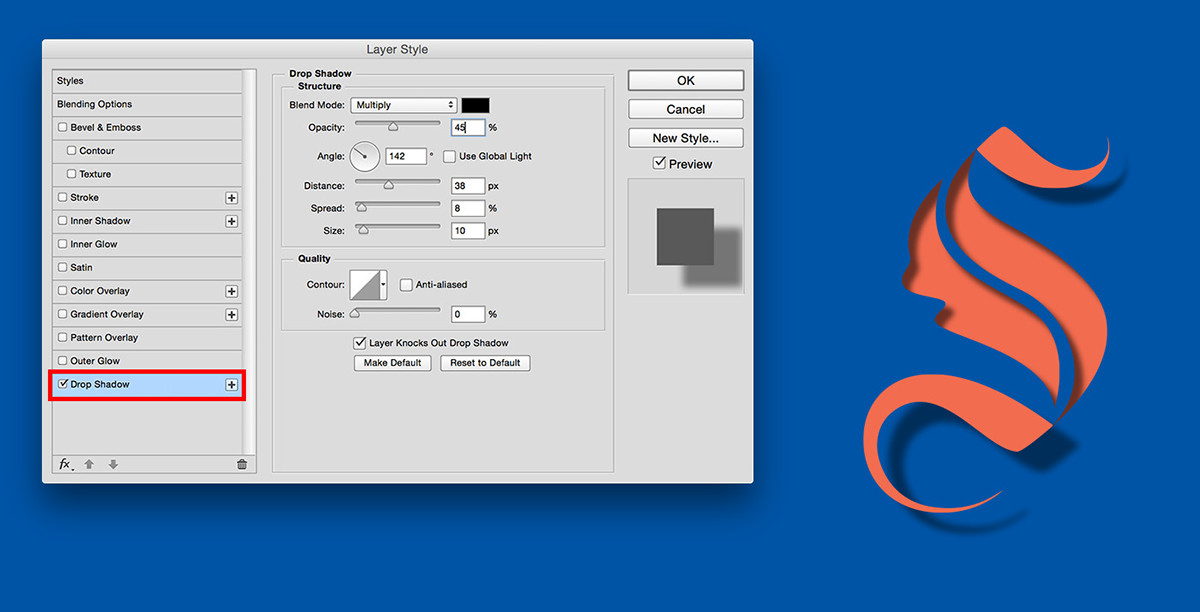
Step 4
Repeat Step 2
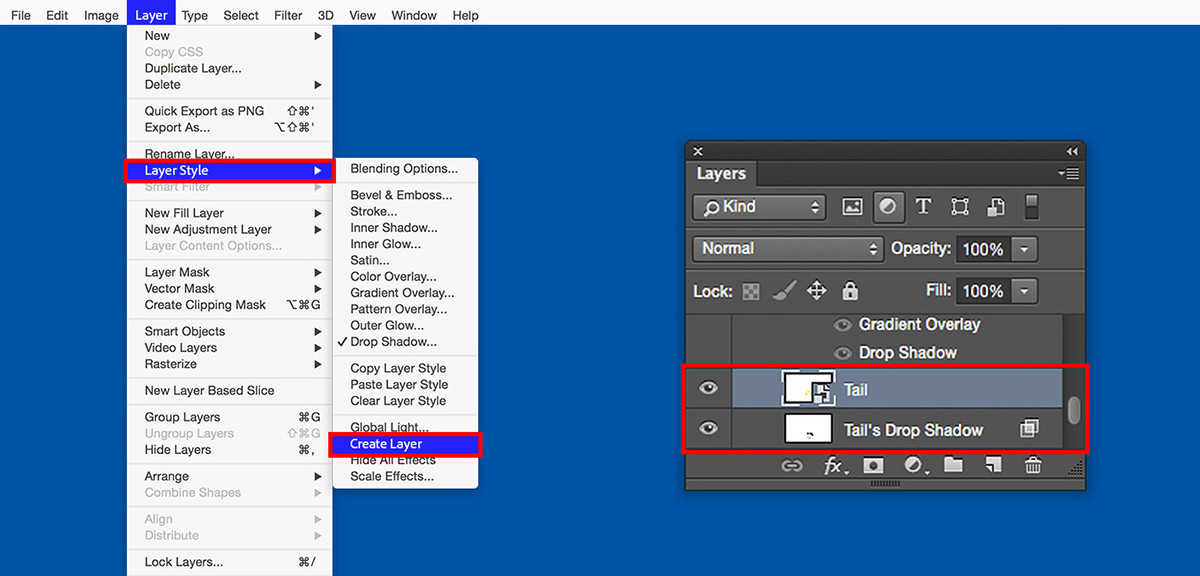
Step 5
To edit the shadow separately from the fill layer, go to Layer > Layer Style and choose Create Layer. In the Layer panel you’ll now have two layers: a shape layer and a Drop Shadow layer.
Step 6
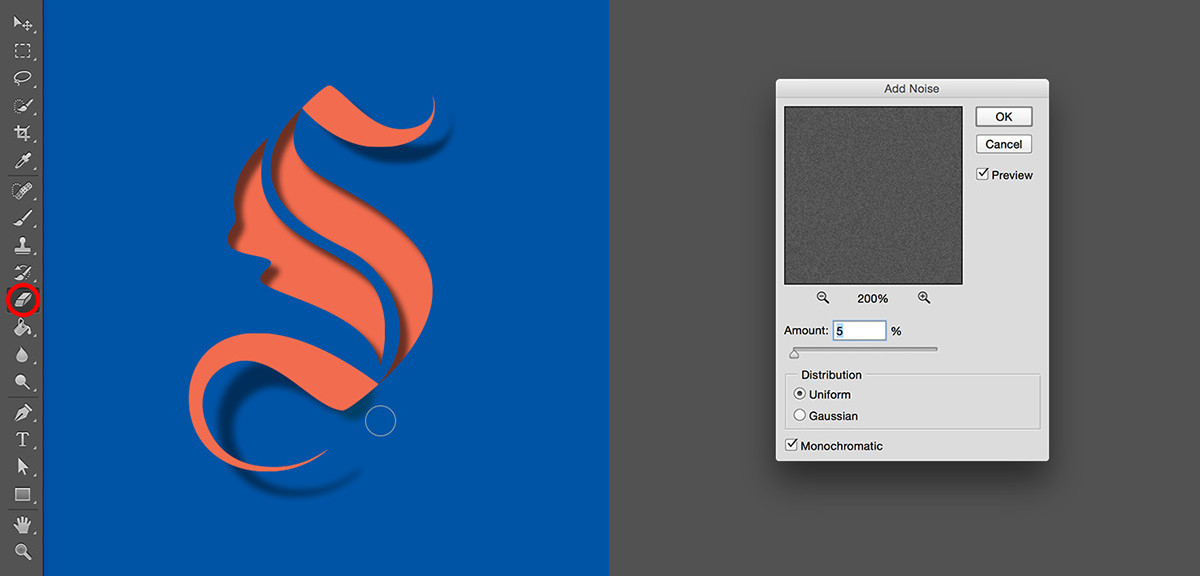
Use the Eraser tool to remove parts of the shadow.
Next, let’s create a grainy paper texture. Make a new layer and fill it with grey color. Then go to Filter > Noise > Add Noise.
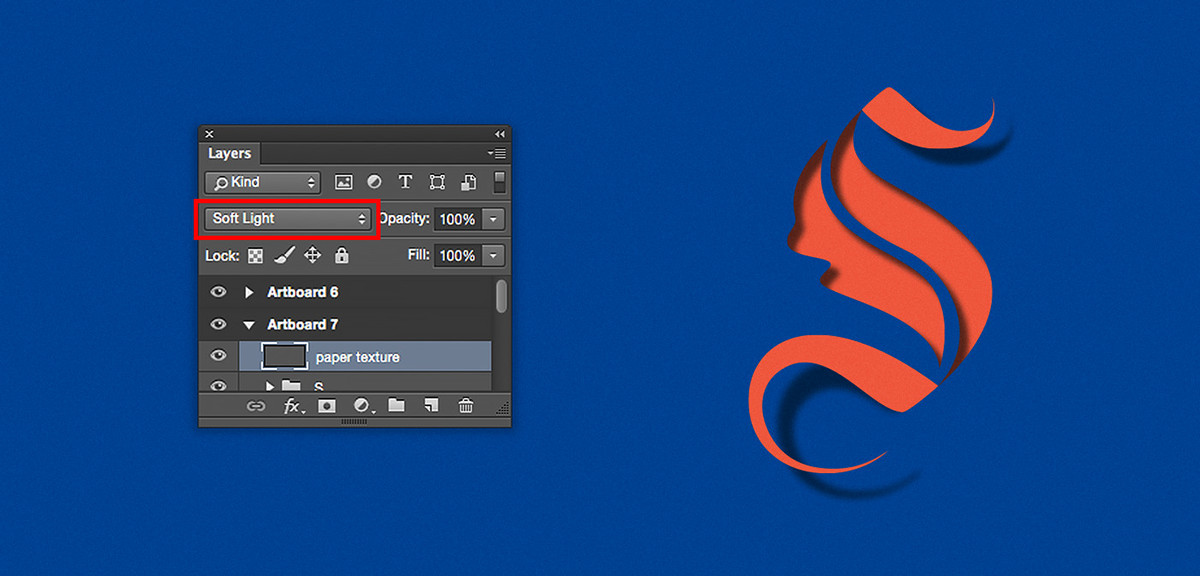
Step 7
To add a paper texture feel to your image, choose Soft Light in the Layer panel.
LEARN MORE:
- Turning sketches into vector shapes with Adobe Capture CC and using them in other Adobe applications: link
- Working with type in Photoshop and getting fonts from Typekit: link
- Syncing fonts from Typekit in Photoshop: link
Also make sure to check out Lidia Lukianova work at https://www.behance.net/lidialukianova
abduzeedo
Apr 05, 2018
Source: Abduzeedo Tutorials
0 Comments
Leave A Comment